Friday, January 31, 2020

12 Kits of Occasions: Rewind with Leftovers


This month at 12 Kits, we taking a look backwards at all our leftovers.
So many elements, papers, twine, embellies, that were waiting to be on a 
card!
Once I started, 7 came together before I knew it! 
In no particular order, and I may not get some of the kit givers right, but come
take a look...


This one was a leftover from Jeanne. She packs her full kits with extra love and 
special goodies. Goodies being candy! Opening her kit is triple wonderful!


I think this was in her kit too! I know I originally used a couple of her Chinese
lanterns, but how did I leave this one? So happy to use it on this card.


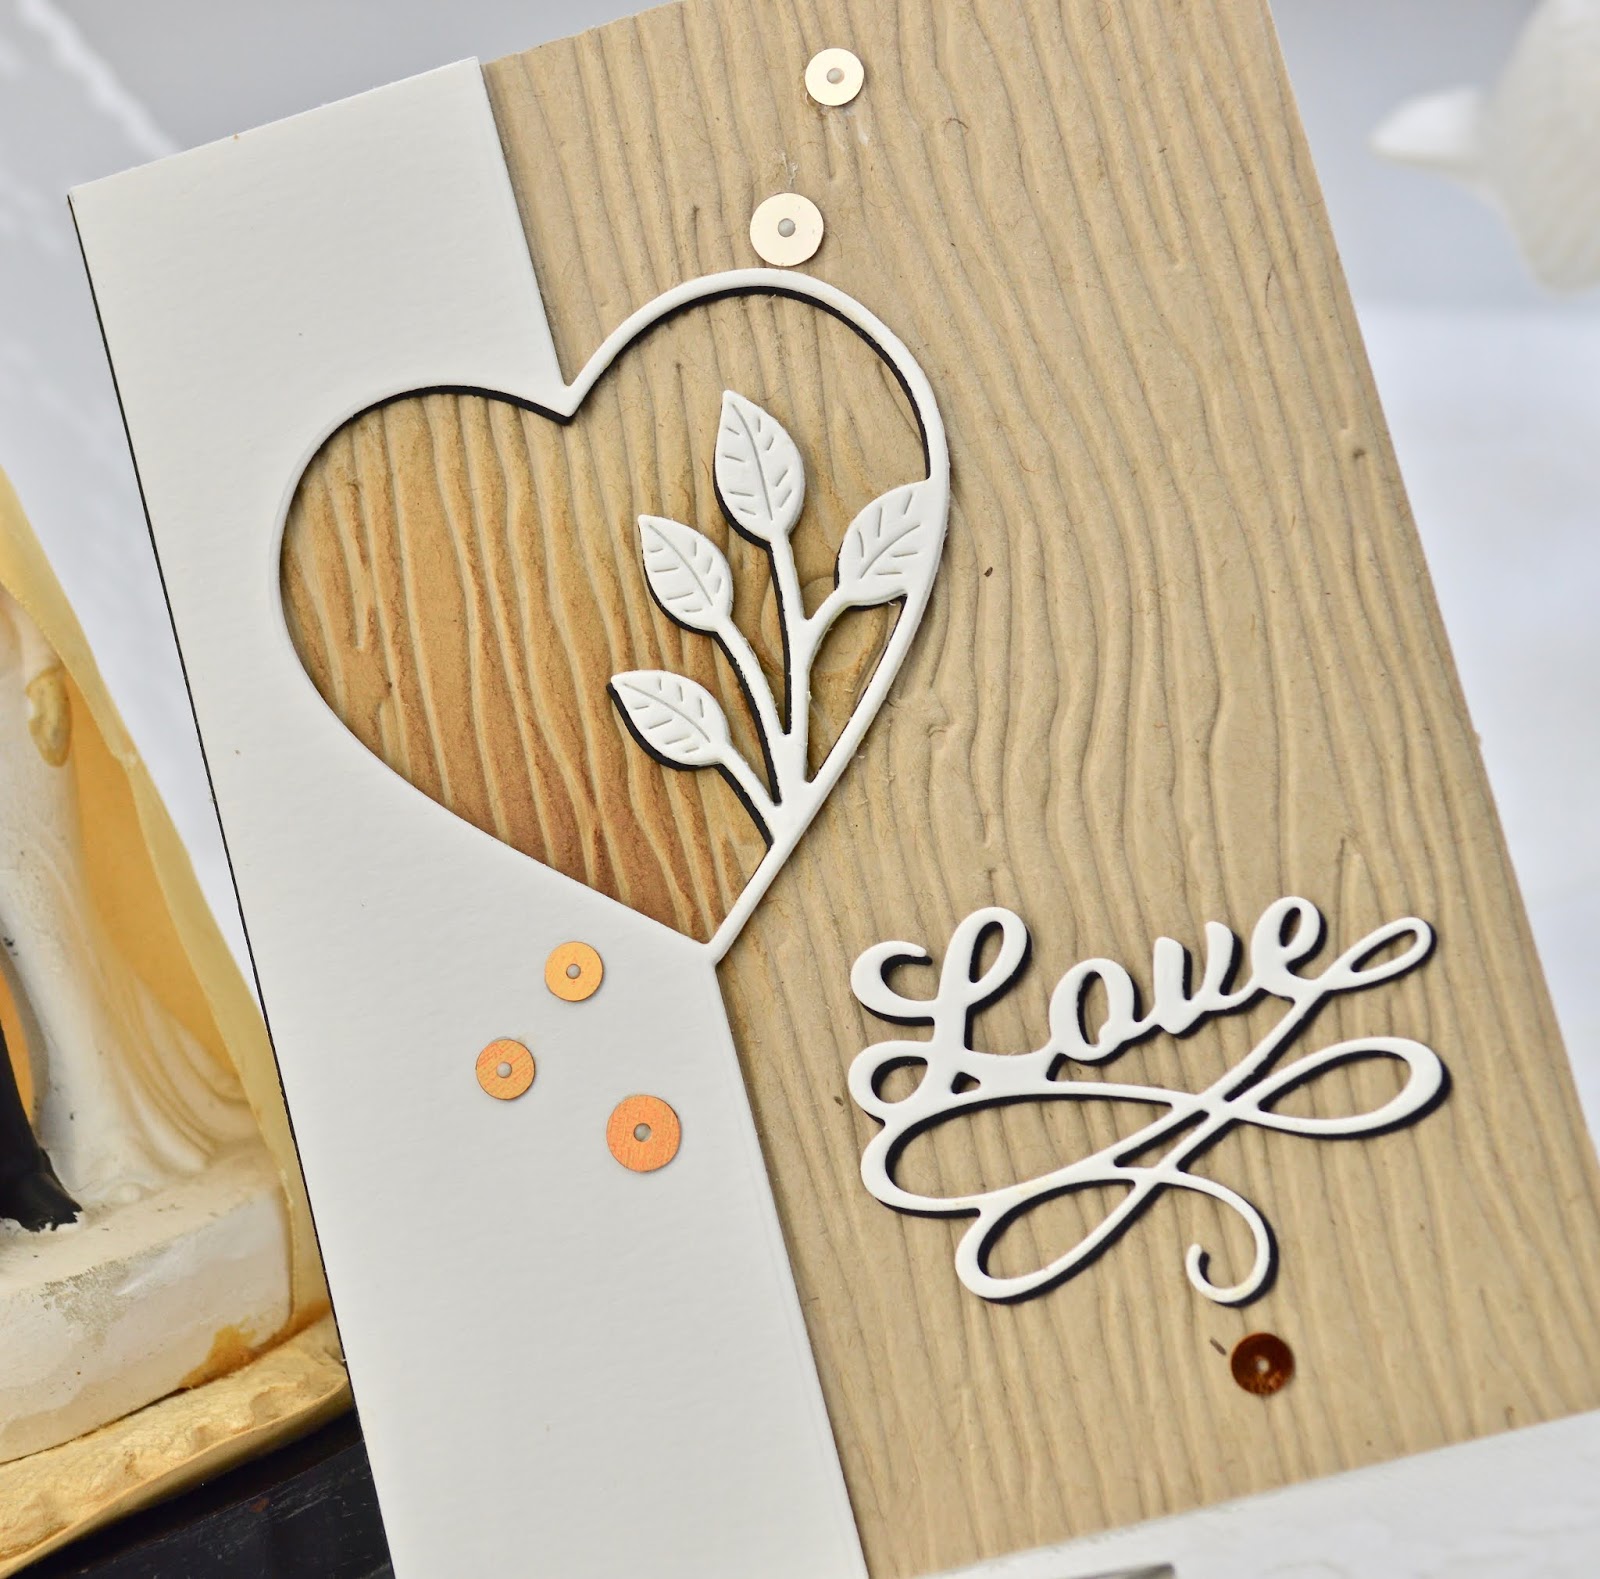
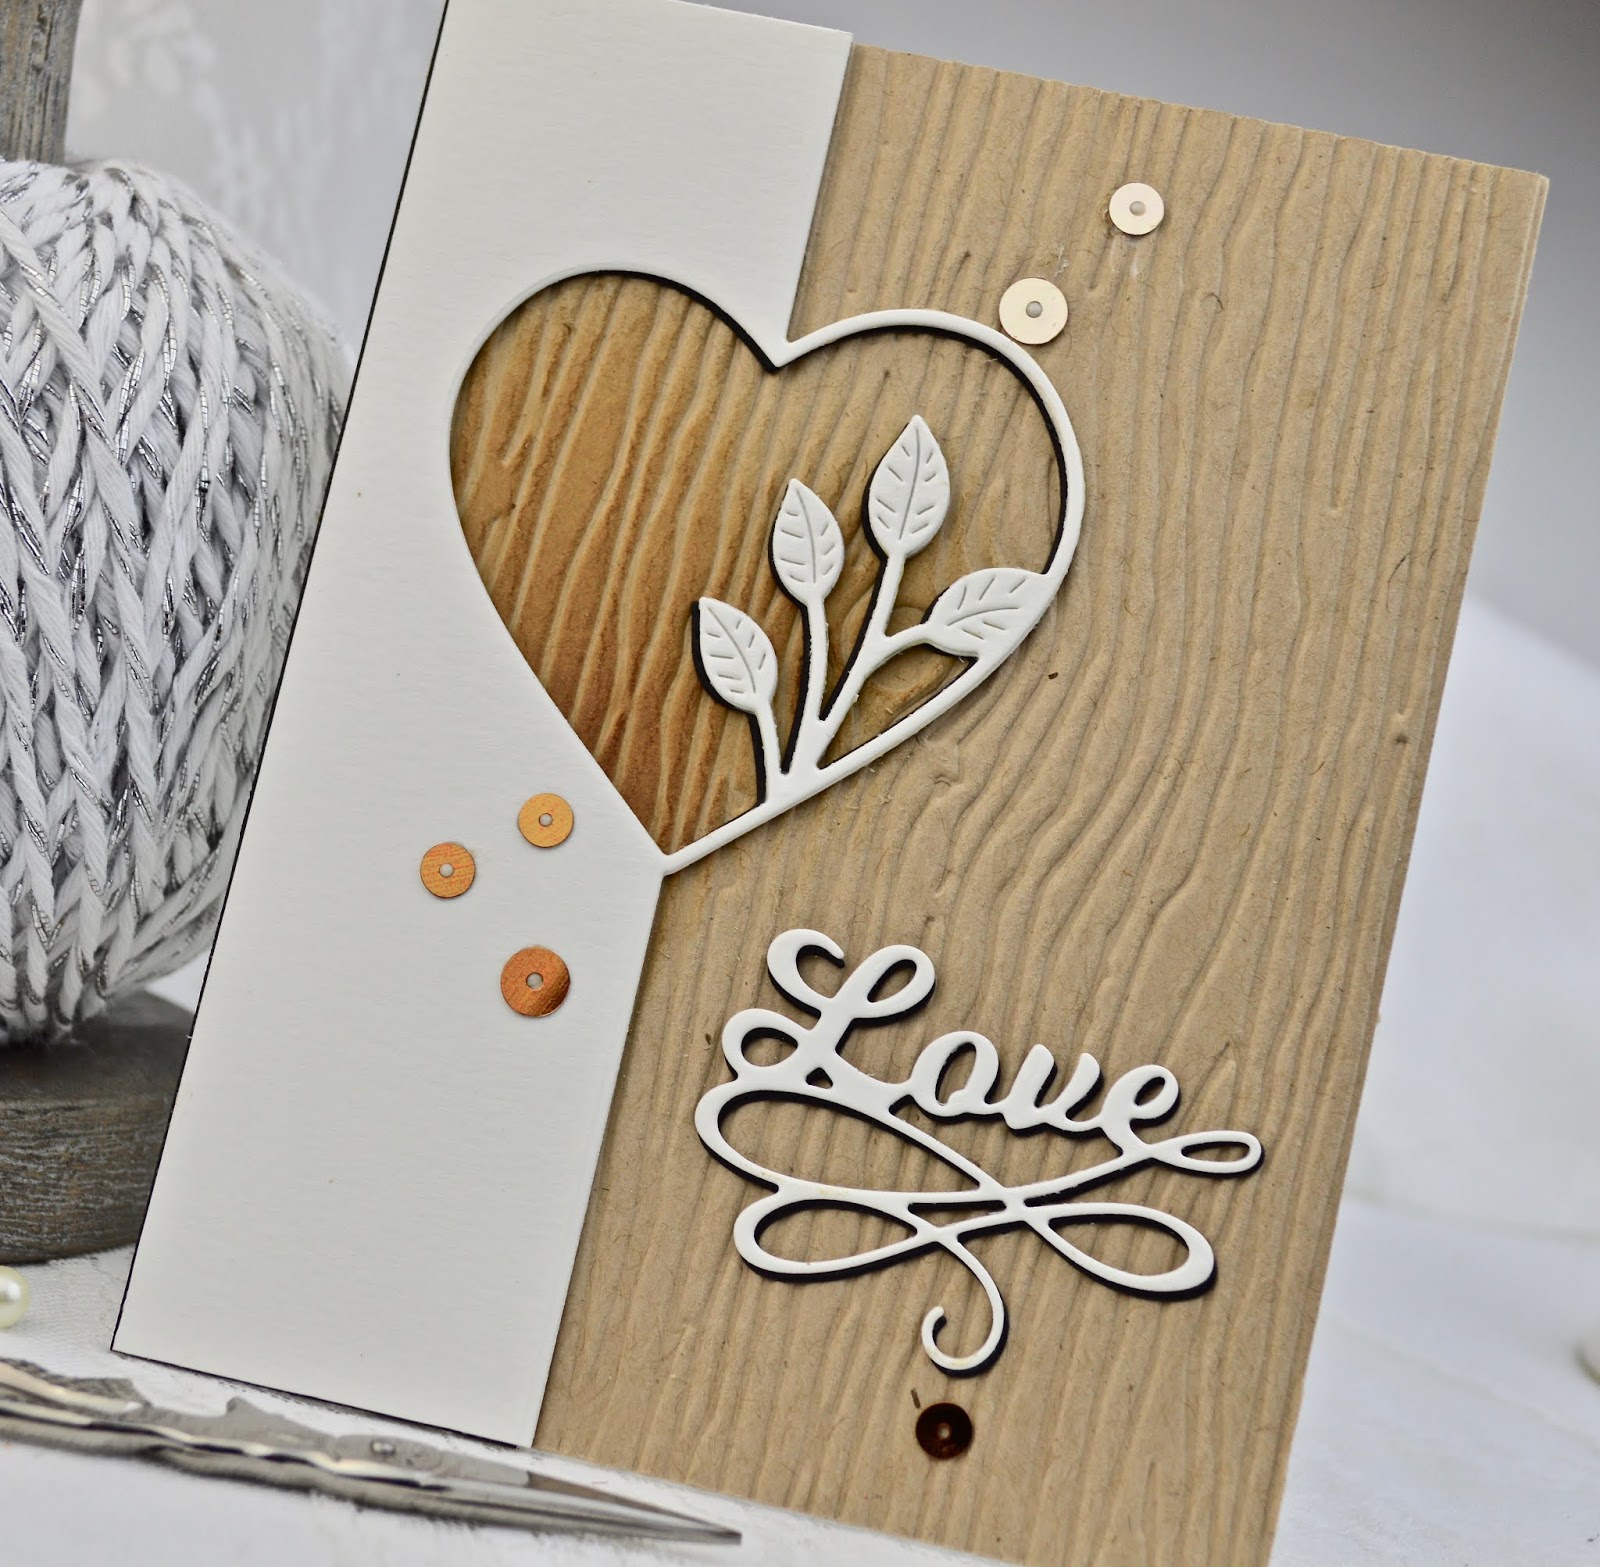
Being a sewer myself I couldn't resist using these adorable PTI thread cards and
embroidery hoop. Paired with die cuts from the Greetery.


Not sure, but I think these were fancy papers leftovers from a kit I sent.
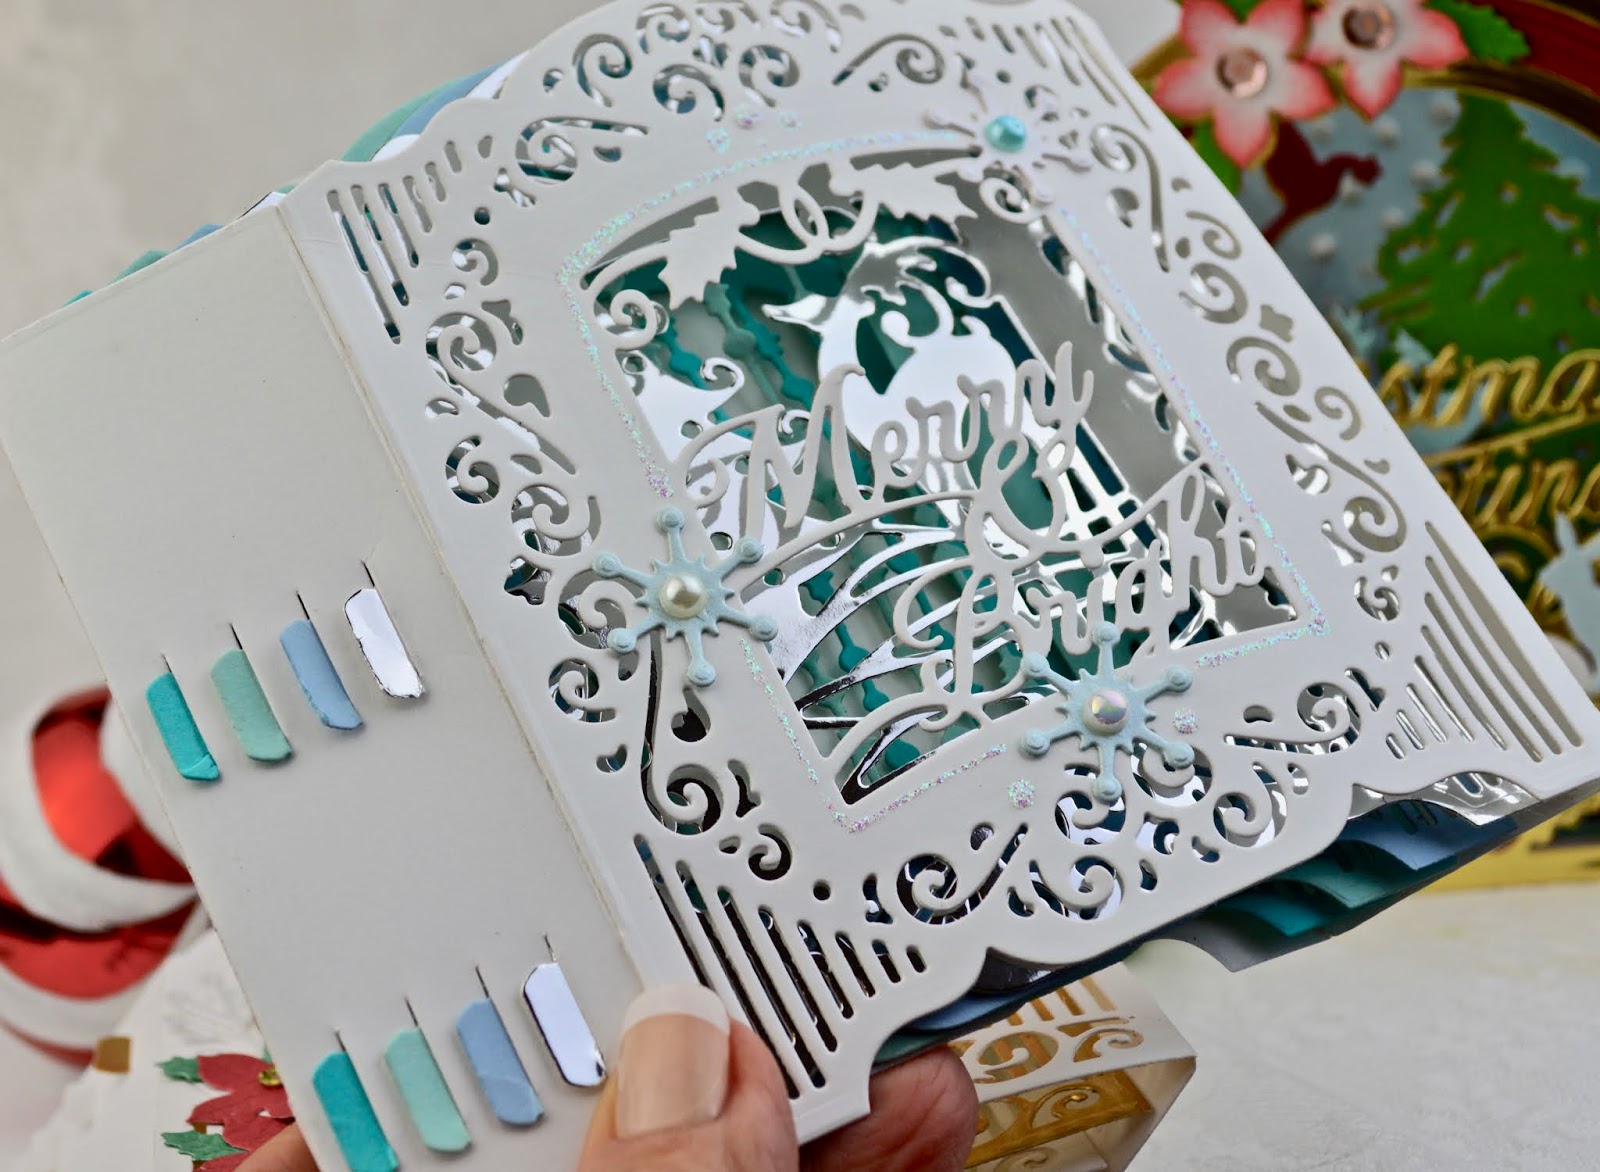
Once again die cut (Nordic Frames) from the Greetery.


The Eifle Tower came black. I used some glitter paste to add glam. Kit courtesy
Michele Ferguson. 


I think this also was Jeanne's kit. The rocket paper, bling and sentiment were 
leftovers. 


And finally a Christmas tag from Marcia's kit. Just had to use that darling mouse!

I have a feeling you're going to love every card and project from this
month's rewind. Be sure and visit all the designers. We even have some
of our alumni with us!

Have a great weekend!

Finished one more,


Saturday, January 25, 2020

Keeping Christmas: January


Greetings Blog Friends, and welcome to my 1st Christmas Card Making
January post! A monthly post especially for creating Christmas Cards.

I'm so excited to be joining a group of fabulous designers honoring Christmas all
year long. Vicki Finger asked if I'd like to join. Of course
I said 'yes'! Once a month on the 25th we post a Christmas card or 2, or 3. The 
object is to be ahead of the Christmas Card Rush. Wonderful! I LOVE Christmas,
all it represents, and all the sharing of a season of joy and giving.
So, with thanks to Vicki and Kelly Lunceford for inviting me, let's get to my
cards.


Christmas is a time to honor and send love to special people in my life.
Among those very special to me are 3 aunts I adore! They just happen to
think my handmades are collectible treasures. That means doing extra special things
that let them know how much I treasure them.
Creating brings me more pleasure than I can express. Last year I added
some of Spellbinders Shapeabilities die sets to my stash: Grand Snow Globe and 
Grand Holiday Cabinet, and ran out of time before I could use them. Isn't that
always the case during the busiest time of the year?
These die sets allow you to create a 3-D vignette, which
folds flat for mailing. (note: you do need extra postage).


There are 6 panels to be cut, a front, a back and four more to decorate creating a
vignette or scene. Together with the slotted side panels, your project becomes
a 3-D greeting.


For one of the 6 die cuts, I created a window with vellum. To do this, I traced around the
circle die, cutting it just a bit bigger so it could be glued to the back. This allowed me to
float the bird with the star as though it were flying toward the tree. The tree is actually
on the panel behind.


The finished vignette with it's matching card. The scene on the front of the envelope is 
done by die cutting a mask, inking around it with metallic gold ink, stamping the tree
and poinsettia (the Greetery), and drawing lines for the address. Very special for 
my very special aunt.


Card 2 features the Shapeabilities Grand Holiday Cabinet die set, paired with their
Reindeer Prance Layering Set.


This set also folds down for mailing. 


And the 3rd is another snow globe in red and gold.


This one uses some of the same elements as the first, with the addition of Spellbinders'
Starry Forrest set.


3 cards for 3 special people, all ready to send. I'm absolutely sold on doing
a few each month, and am thrilled I was asked to join 'Keeping Christmas'.
Be sure to visit all the designers. I know there'll be oodles of inspiration.
Here's a list:

Kelly Lunceford (Creator)


Friday, January 24, 2020

Creating Tag/Cards with Poppystamps


Hi and welcome to another Poppystamps post. I'm up on the blog today 
bringing you some simple tag cards made with the new Valentine release.


All the how-to's are on the blog to create these fun, mailable valentines

All the products used are on the blog, but I've listed them below as well.
Their links will take you to the store.

Thanks for the visit! 
Have a super crafty weekend!


Supplies

Wednesday, January 22, 2020

Love card


We have a new challenge at the Card Concept, Cozy Cabin.


I created a Wedding or Anniversary card with Poppystamps' Simple Leaf Heart Split Border.
It's a beautiful subtle and simple die that I let shine using a wood embossing folder for the 
background.


The wedding topper in the background is from parents' wedding cake. My mom kept
it in a cabinet for years, quietly watching over the other knick knacks on the shelves.
When she was failing, she asked if I'd like to have it. Of all she passed on to me, this
sweet piece of her life of 49 years with my dad is my dearest treasure.   


Poppystamps' Valentine release is in the shop now, and this love with it's flourish tail
is among my favorites! 

The Card Concept Challenge runs for 2 weeks, and we love seeing what
inspires you from the photo.


I used the wood to inspire my Clean and Layered card. But there are many things
you could use for inspiration.
Our designers have lots more inspiration for you. 


Supplies

Wednesday, January 15, 2020

Poppystamps Challenge: From the Heart


We're thinking love on the Poppystamps blog, with our challenge: From the Heart.
I used the new Floral Lace Heart Split Border Craft die to create my heart card.


A big lacy heart heart has extra drama with the glitter paper. Wish you could see it irl!


Added punch with the 'Love Flourish' die cut from red glitter paper!

Come play along  all month on the Poppystamps blog here:


Tuesday, January 14, 2020

A Quartet of Pine Blossom


Hi and Happy New Year! 
Well, the New Year is off to a happy start. Saturday was one of those days
with no one around, quiet and chores free. Way too good a day to waste!
The holidays came and went so fast, I hadn't used the Greetery's Pine Blossom
at all, and there it was right on the top of my order.


I die cut and stamped the bouquet and flowers in several colors.
I hadn't used the Berry Branch Stencil either. 1st inked, then played with
stencil paste in a couple of colors.


My stash of birthday cards is low, so all 4 cards were done for winter birthdays.


My outdoor garden is sleeping right now. It's down to freezing where I live,
but on this card it's bright and happy.


I just love the new bow Betsy created. So open and animated!


And finally one with my favorite greeting, blessings.

Nothing better than a crafty weekend!

Here's a list of what I used: All Greetery
Pine Blossom stamp set and dies
Fit to be Tied die
Inside Out Berry Branch die
Berry Branch stencil
Terrarium die
Knit Wits stencil
Nordic Frames die


Wednesday, January 8, 2020

The Card Concept: Time to Celebrate


The Card Concept is back after a holiday vaca, and our photo challenge is a celebration
of gold!

Are you inspired? Think golds and pearls, candles and clocks.
The Card Concept has a style for you.


Min is gold and glam for a Classy and Elegant and Layered card.
All Altenew for my stamped background and script.


A little bit of depth with the doubling of die cuts.
Play along for a chance to win a guest designer spot,
with one our styles, combine a few or create with one of 
your own.

Altenew:
Mid Century Frame Die
Baroque Motifs Stamp Set (Background stamped in gold)
Mega Greetings Stamp & Die Bundle
Shimmer Cardstock (PTI)